
Once you've authorized your Facebook Page, you can post to that Facebook Page from Raven:
- Navigate to Social > Facebook.
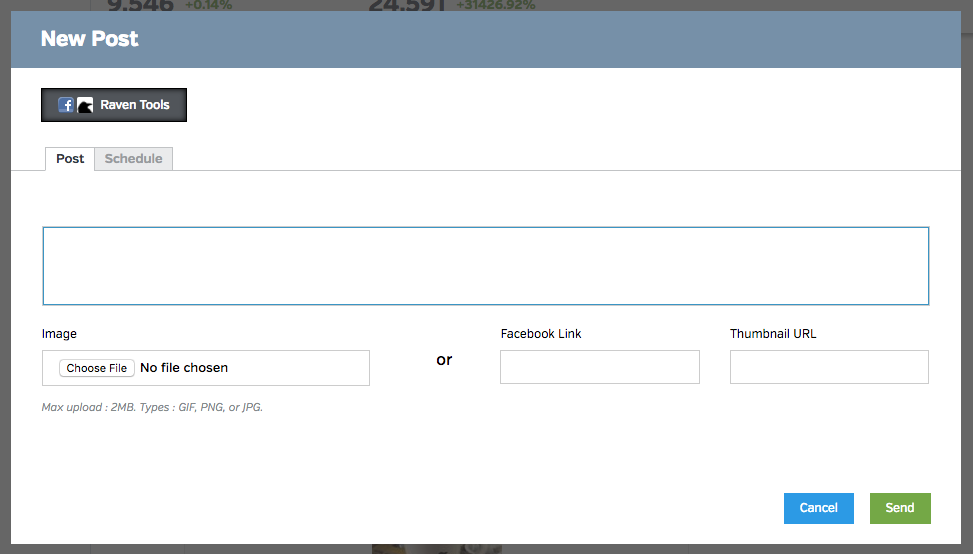
- Click the New Post button.
- Compose your post using the Post box.
- Once you've composed the status update portion of your post, add an image or link if applicable and/or schedule your post.
- Image: To upload an image directly to your Facebook Timeline, click the Choose File button and pick an image from your computer. Be aware that Raven only supports images up to 2MB in size and in GIF, JPG or PNG format. Facebook doesn't allow animated GIFs and will, instead, just show the beginning frame.
- Link: If you don't want to post an image, use the Facebook Link and Thumbnail URL fields to post a link. This will, respectively, share a link and specify the image that appears alongside that link. If the Thumbnail URL is left blank, the post will not have a thumbnail picture.
- Schedule: Click the Schedule tab to send your post in the future. You can select the date, time and timezone. You can set your default timezone per Campaign in Campaign > Campaign Settings. For more information about scheduling posts, see below.
- Click the Send button to send or schedule your post.
Schedule Posts
You can schedule a post to send at a later time by clicking the Schedule tab when creating a new post. In this tab, you can specify the date, time and timezone for your post, then set it to post at that time. You can set your default timezone per Campaign in Campaign Settings.
Click the Scheduled Posts icon to see your pending Facebook posts and a history of scheduled posts for the current Facebook account. From here you can edit or deleted pending posts using the gear icon to the right of each post.